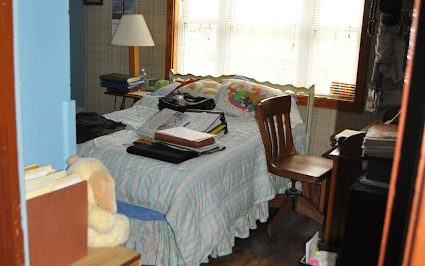
To demolish a bedroom in an old farmhouse takes commitment and a goal in mind. Along the way, beautiful marks of history are discovered. Unique building practices are revealed. Nails are plentiful and led paint floats through the air. History is being discovered and made all at the same time.
Oftentimes we just jump right into a home demo project by ripping out carpet and taking down walls without thinking through the entire project. This is usually the case when time is short and the job just needs to begin. Or it’s the case because you are so excited to see what is beyond the walls and floors!
How to Begin a Home Demo Project
1. Have a Plan and Timeline
Start with a plan in mind. Give yourself time to form a plan and a timeline to finish the project. Right down to the little details such as trim and painting. How much time will you give yourself for the project? Where will the outlets go? If we don’t put an end date on the project and think through the details, it may never get completely finished and you may miss important details.
2. Gather Tools and Equipment
Ensure you have all the right tools for your project before you begin. A sledge hammer, shovels, hammers, prybars, face masks, safety glasses, wall plastic, first aid kit etc. Create a list of all the tools you’ll need to make the project run smoothly. This saves your legs from running around finding things in the middle of the project. Pausing a project to find a tool can be frustrating. Have it all ready before you begin.
3. Cleanup Crew
Cleaning up the rubble and dust is oftentimes the worst part. It takes time and feels like an endless job. Be prepared to have a few people on hand to help you and have a place for the rubble to go. A roll-off dumpster in your yard is key to demo. Construction dumpsters allow you to drop any construction material in them. Concrete, wood, nails, plastic, it can all lgo in. This makes cleanup simple.
Beginning Bedroom Demo
First things first – ditch the old brown shag carpet and discover what is underneath. Is there a sub floor or are you lucky enough to have maple hardwood floors? These floors had been untouched for a good 30 years or more. The floors will be refinished and made to look new again.
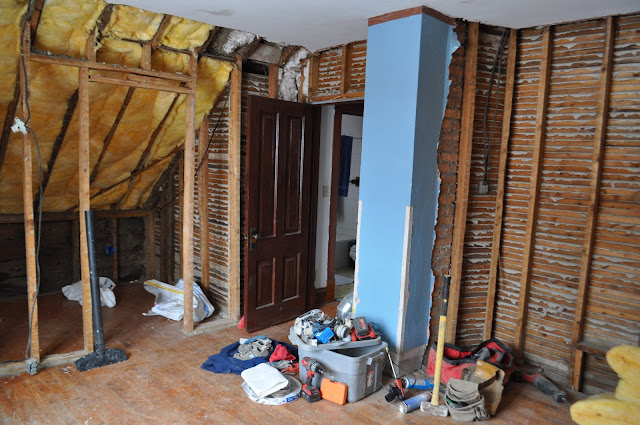
Why We Removed the Historic Plaster Walls
Plaster is historic, decorative and it gives an old house character. It is said that in the early 19th century, house plaster work was a means to express social status. This meant that the more plaster you had the wealthier you were. This house was apparently built by a very rich man then because all walls are plaster.
Unfortunately on top of that plaster was a few layers of lead based paint that needed removal and the house lacked insulation. We would have loved to keep the plaster walls, they are very unique and really do bring you back to a time in history, but we knew we wanted to continue growing the age of the home and stay warm.
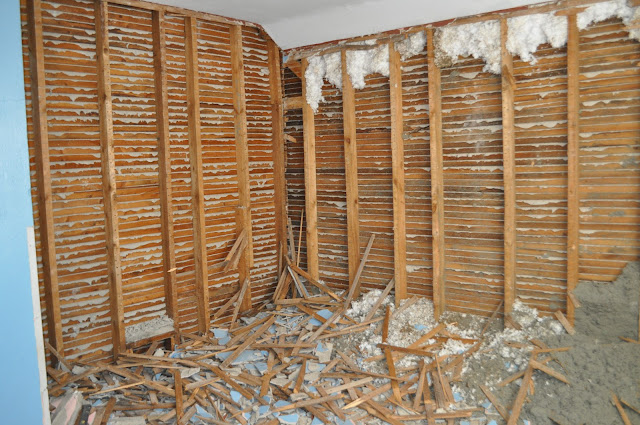
Plater Walls and Hand Nailed Slats
Plaster walls really are incredible. Each one of those slats-boards you see there was hand nailed. We almost felt bad ripping it apart. Someone worked terribly hard to build this bedroom butt in order to insulate the room properly, it all needed to come down.
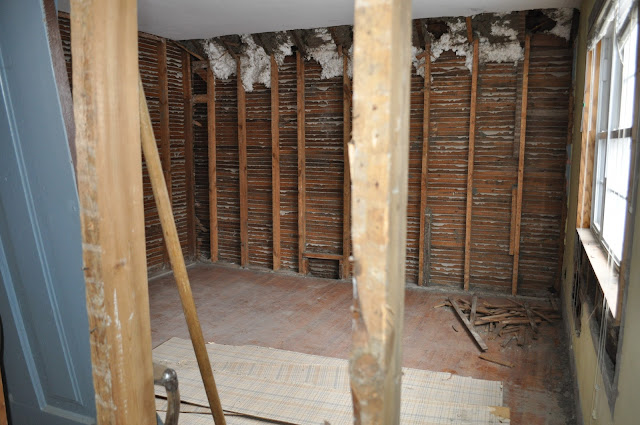
Protect the Hardwood Floors During Demo
The wall with the wallpaper had paneling over the plaster. When we tore down the wall we reused the paneling on the floor to protect the hardwood as we removed the plaster and slats from the walls. Using plywood or even a tarp if that’s all you have to protect the floors will be worth it. You will eventually sand and refinish the floors, but to save yourself from big divots in the floor, try to protect them as best you can.
Where do you Begin with Demo Cleanup?
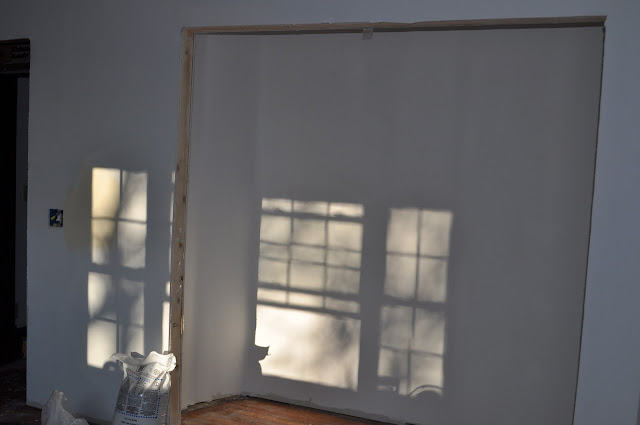
This is one of those demo jobs where there is no good place to start or stop. You just jump in and keep at it until the work is done. They don’t always show you this part on HGTV do they? We hung plastic/poly on the doorway and beyond in order to contain some of the dust, but you know dust. It finds a way. You do the best you can with what you have.
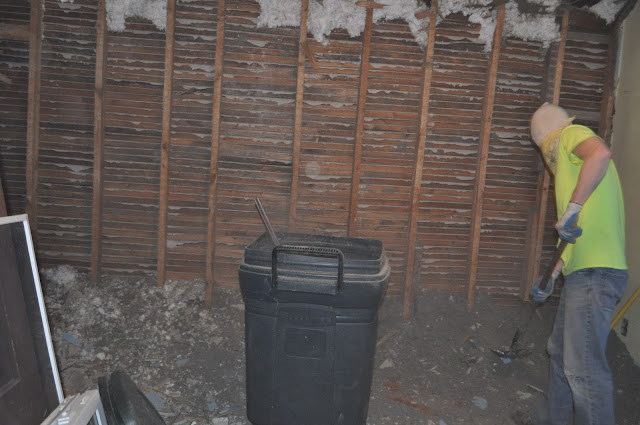
How We Removed Rubble from an Upper Bedroom
What are we going to do with the mess? Since this was an upper bedroom, the best way to remove the rubble was out the window. We did not want to ruin the stairs by going up and down with pails of plaster and insulation so we filled a garbage can and it went out the window. We built a ‘slide’ out of a sheet of tin and raised the bucket of a skid loader to the roof line. We were able to dump the rubble down the ‘slide’ and have it land in the bucket loader below without making too much of a mess on the ground.
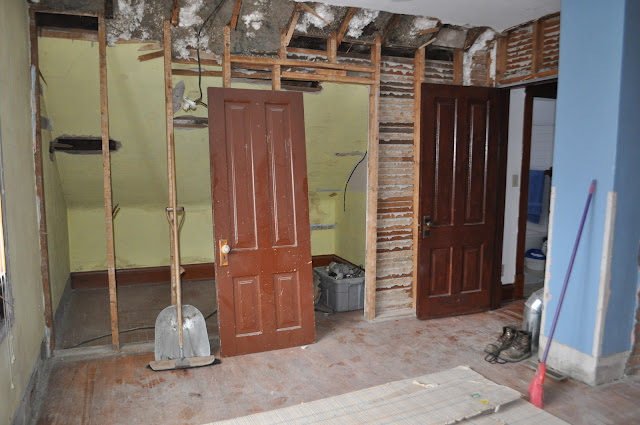
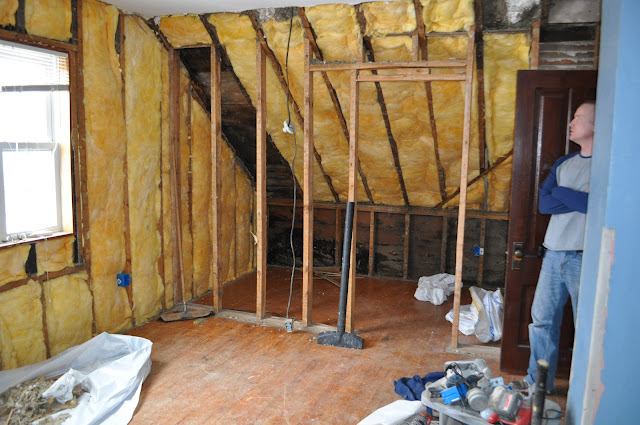
Bedroom Closet Wall Demo’d
We saw this 5′ deep closet as usable living space and eventually opened it up to the rest of the room. It provided more square footage to the room and it looked like a nice reading nook or a place for a toddler bed or crib. We planned to install a closet on the other wall so it made sense to use this space for other things.
Looking back, we should’ve just kept it a closet because it made the room long and a little awkward. The roofline is too low do much with it. We did put a half wall back in to give the bedroom another wall to put a bed on and we use the closet room as a place for a dresser.
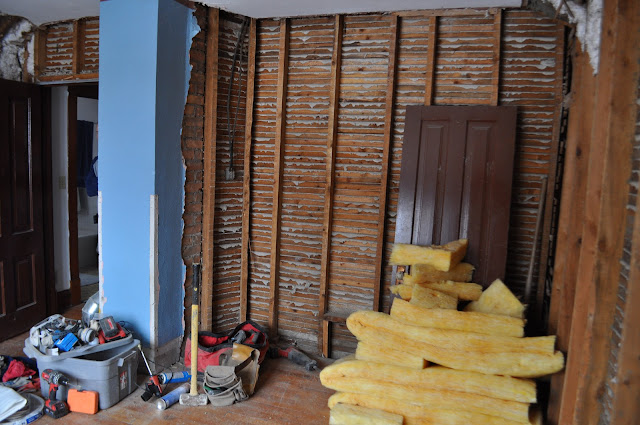
Expose the Chimney or Not?
You can see the chimney on the left (still blue). We tried to chip the plaster off to expose the brick but it didn’t work. Chipping plaster off of the chimney may have taken the rest of our lifetime. Even with the most ‘gentle’ touch to remove the plaster, some of the brick would be removed with it so we chose to sheetrock over it. The bit that you can see, didn’t have plaster on it so it looked really neat and got us excited but after exploring more we realized the rest of it is covered in plaster and it was not coming off. It just was not worth it to use. We needed to move forward.
If this was in our Kitchen we may have worked a little harder to expose parts of the chimney. But since it was a bedroom, we figured the kids are just going to stick their chewed gum into the cracks and not really appreciate the beauty and history of it so away it went. hidden for the next hundred years.
Electrical Installation
First the wiring. I will be the first to tell you that taking time to sit down and contemplate where you want lights and outlets is 100% worth your time! Do not swiftly blow past this detail. It is so important to consider lighting. We were a little limited with overhead lighting options because we didn’t remove the plaster ceiling, nor did we want to patch any holes. The overhead light was fine. We should have installed another light into that closet space but at the time we were opening it up to the rest of the room so it didn’t make sense to do so. But a small sconce on the wall would have been sweet. Making sure you have enough outlets on each wall is important. Planning where the bed will go so you can put an outlet near night stands is common.
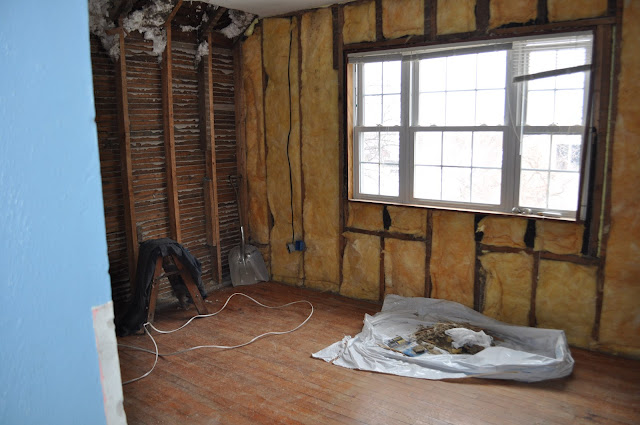
Insulating the Bedroom
After the wiring was finished we insulated the exterior walls with batt insulation and a layer of pink foam board for the vapor barrier. This was sure to keep that north wind out and the warm wood head in. Some day the window would be replaced to ensure an even warmer room.
Previously, these rooms were heated with radiators along the window walls. Those were removed a few years ago when geo thermal and an outdoor wood burning stove was installed. This gave the house a more even heating and cooling. The house had never been cooled by anything more than a window unit air conditioner. Vents were installed into all the rooms and the radiators went out.
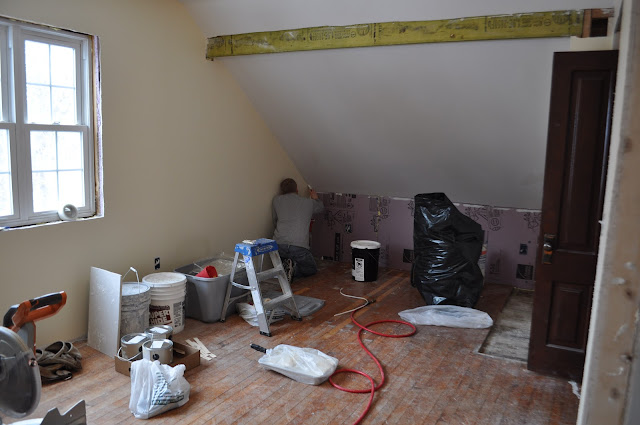
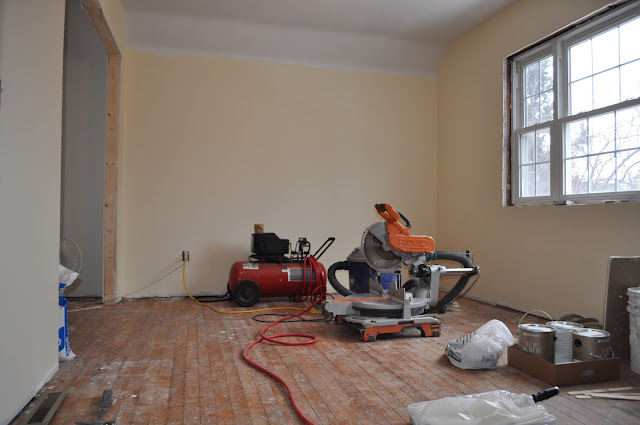
Sheetrocking the Bedroom
After insulating came the joy of Sheetrocking, taping and mudding. Hauling 70lb sheets of rock up narrow farmhouse steps was quite a chore. None the less this is a job that can be accomplished by the home owner. Yes even you can tape and mud sheetrock yourself. It might take twice as long and be twice as messy and dusty as a professional, but it’s completely doable and a great cost savings.
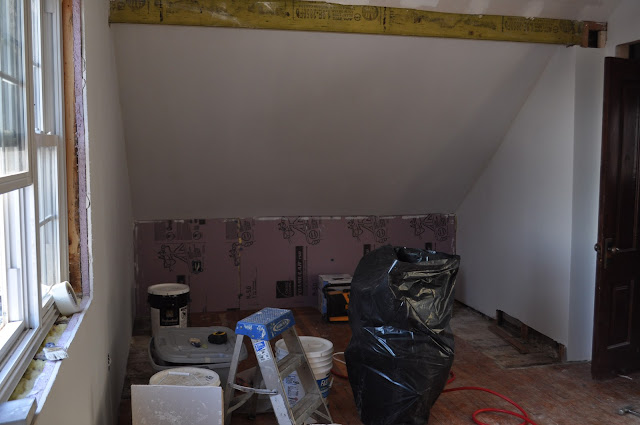
Exposing the Beam
The closet is now part of the room. The wall that was removed was reinforced by a beam to support the roof. We considered wrapping the beam to give aesthetics to the room but at the end of the day, when some projects need to see an end, the priorities change. We chose not to wrap and expose it.
Exposing a beam is a beautiful thing and if time allows and energy on the project is abundant absolutely do it. Don’t pass by these opportunities for beauty in a room. Oftentimes, when renovating an old farmhouse there are so many other little details and hiccups along the way that sometimes you just want to finish a project and quit for a while. Most every weekend is spent working on the house, most evenings are spent doing little things on the house and so when it comes to ‘extras’, they tend to become less important on the list. If we did all the really cool ideas we wanted to, we would still be working on that single room! Remember the brick chimney…
Removing and Re-doing Hardwood Floors
Since we opened up the closet to the room, where the wall was removed there was a gap between the two rooms. We thought about just adding a transition piece, but instead decided to create a more natural look. We removed a lot of the closet boards and blended them back into the bedroom boards. This was a ton of work for what it was and a transition board would have been fine and unique. We were lucky to have a small pile of maple flooring from an old building to use for this project. Carefully pulling up the boards and blending took a long time and a lot of patience.
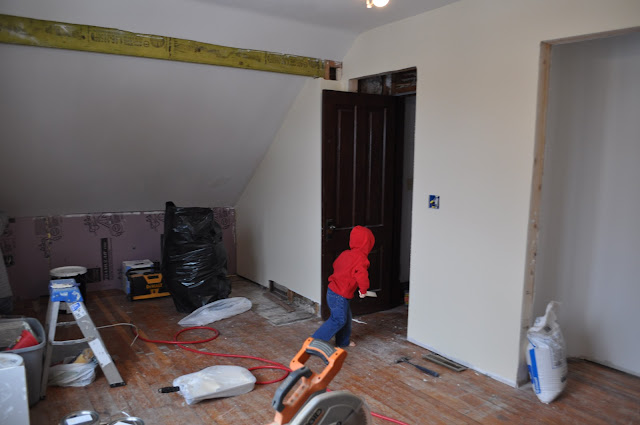
Why We Moved the Door
It’s hard to catch but we moved the door in. We moved the door in to be flush with the side of the chimney so we could add a small towel closet in the hallway across from the bathroom. These are the creative ways to use space. This allowed a bigger landing/hallway around the bathroom and stairway and storage for the bathroom. Which, in old farmhouses there is very little to no storage options anywhere. Creating storage is always a thought when remodeling a hundred year old home.
Adding a Closet
This was an awkward space in the room. We saw it as a good spot for a closet. We squared off the walls and framed it in so we could put doors on. We would eventually build shelving and install a permanent dresser into the closet.
Painting the Walls
Painted. Hirschfields “Haystack”. Painting the walls a light yellow really gave the room a bright and warm feel. this is a west facing room with plenty of evening sun.
The part of the ceiling that transitions into the wall, it’s at an angle and it was removed with the slat walls so it needed sheet rock. In order to keep the plaster look, which the rest of the ceiling was, we added sand to the paint to give the effect of plaster.